

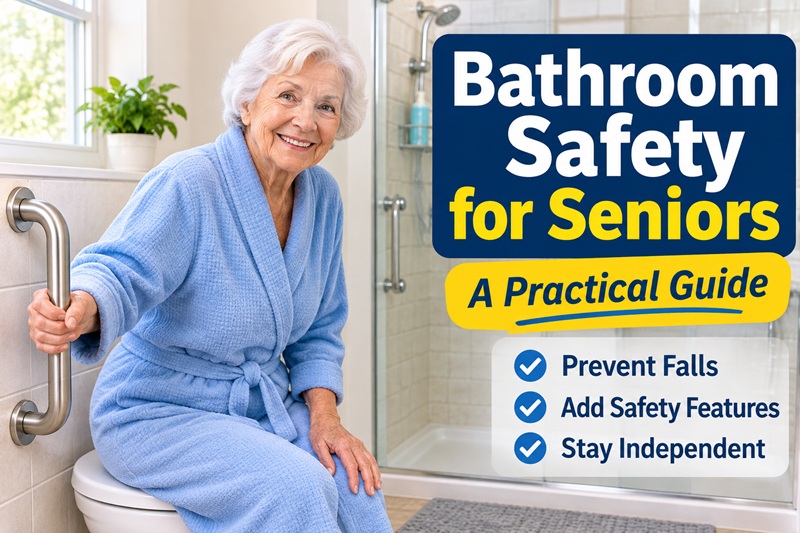
Bathroom Safety for Seniors: A Practical Guide
When an older family member who uses a walker moved in with us, I started seeing our bathroom differently. We had a bathroom that was not safe to use. We had no grab bars, and the floor or the tub was slippery. I have also had a few falls myself over the years.
This bathroom safety guide covers the changes that matter most in a senior bathroom, including where to put grab bars and how to install them safely. I cover the basics here and link to my product reviews if you want specific picks.
Quick take
- Grab bars are usually the highest-impact upgrade, but only if they are fastened into wall studs or properly anchored.
- Next come non-slip surfaces, good lighting, and a stable way to get in and out of the tub and on and off the toilet.
- If you are unsure what is behind your wall, hire a professional to install grab bars.
Why the bathroom is risky
The bathroom combines wet, hard surfaces with movements that challenge balance. The risky moments are predictable:
- Stepping over the edge of the tub
- Standing up from a low toilet
- Turning or reaching on a wet floor
- Nighttime trips in the dark
Each of the fixes below targets one of these moments. For the rest of the house, use my home safety checklist for seniors.
Where to start
If you can only do a few things, do them in this order:
- Add grab bars at the tub or shower and next to the toilet.
- Make wet surfaces non-slip.
- Improve lighting, especially for nighttime trips.
- Raise the toilet height or add support rails if standing up is hard.
- Sit while you bathe, with a shower chair or transfer bench.
- Lower the water heater temperature and make sure help is reachable.
Grab bars: where to put them
The three most useful places are the tub or shower entry, inside the tub or shower, and beside the toilet.
At the tub or shower entry
A bar you can hold while stepping over the edge makes the riskiest movement much safer. Many people use a vertical bar here, because it gives a steady handhold as you shift your weight.
Inside the tub or shower
A horizontal bar on the long wall helps with balance and with standing up from a seat. Place it where you can reach it without leaning.
Next to the toilet
A bar on the wall beside the toilet gives you something solid to push up from. If the wall space is limited, free-standing toilet safety rails are an option.
How high should they be?
The ADA accessibility standards place bathroom grab bars 33 to 36 inches above the floor. The ADA applies to public and accessible spaces, not private homes, but the range is a good starting point. Because everyone is a different height and has different needs, have the person who will use the bar stand, step, or sit and show where they naturally reach before you mark the wall.
What to look for when buying a grab bar
- Thickness: about 1.25 to 1.5 inches, which most hands can wrap around.
- Wall clearance: about 1.5 inches between the bar and the wall, enough to grip but not enough to trap an arm.
- Strength: rated for at least 250 pounds. Many bars are rated higher, so check the box.
- Material and grip: stainless steel or another corrosion-resistant finish, ideally with a textured surface for wet hands.
- Mounting: designed to be screwed into studs or used with heavy-duty anchors made for the purpose.
- Avoid: suction-cup bars as primary support, and never use towel bars or soap dishes as grab bars.
For specific recommendations, see my review of bathroom grab bars.
How to install a grab bar
Only do this yourself if you are comfortable with a drill and with finding studs. Always follow the manufacturer’s instructions, since these are general steps and your bar may differ. If anything below is unclear, hire a professional.
What you need
- The grab bar and its mounting hardware
- A stud finder
- A drill, plus a tile or masonry bit if the wall is tile
- A pencil, painter’s tape, a tape measure, and a level
- Waterproof silicone sealant
Steps
- Choose the spot with the person who will use it. Have them show where they naturally reach, and use 33 to 36 inches above the floor as your starting point.
- Find the studs with a stud finder and mark them. Studs are often about 16 inches apart, but check. Be careful of pipes and wires. If you cannot tell what is behind the wall, stop and call a professional.
- Line up the bar with the studs. Ordinary drywall anchors will not hold a person’s weight. If the studs do not line up, use anchors specifically rated for grab bars, or add support behind the wall during a remodel.
- Mark the screw holes and check that the bar is level.
- Drill pilot holes. On tile, put painter’s tape over the spot to keep the bit from slipping, use a tile or masonry bit at low speed without the hammer setting, then switch to a regular bit for the stud behind it.
- Seal the holes with waterproof silicone so water cannot get into the wall, as your instructions direct.
- Fasten the bar with screws long enough to reach well into the stud. Use the supplied hardware unless the instructions say otherwise. Tighten evenly and snap on the covers.
- Test it before anyone uses it. Push, pull, and gradually put weight on it. It should not shift, flex, or rattle.
- Recheck every few months and tighten if anything loosens.
Tile, fiberglass, and acrylic walls
Fiberglass and acrylic tub surrounds are thin and cannot hold a bar by themselves. The screws have to reach the studs or solid backing behind them, which is often easier for a professional to do. Tile is workable with the right bit, but it can crack if you rush.
When to hire a professional
- You cannot find studs, or the wall is plaster over lath
- You are unsure about pipes or wiring behind the wall
- The wall is a fiberglass or acrylic surround
- The person will rely heavily on the bar, for example after surgery
A handyman or contractor with accessibility experience can help. Some contractors hold a Certified Aging-in-Place Specialist (CAPS) designation.
Non-slip surfaces
Wet bathroom floors and tub bottoms are slippery even for people with good balance. Non-slip mats and adhesive strips add grip, but they work only if they are in good shape.
- Use a non-slip mat or adhesive strips inside the tub or shower.
- Use a mat with rubber backing outside the tub, and remove loose throw rugs.
- Clean mats and strips regularly, since soap scum reduces grip, and replace them when they wear out.
- Wipe up puddles right away.
See my picks for bath mats for seniors.
The toilet: height and support
Standing up from a low toilet is hard on knees and hips. Options include a raised seat or toilet height extender, safety rails, or a grab bar on the wall beside it. If you are replacing a toilet, a comfort-height model is higher than a standard one; ADA-height toilets sit about 17 to 19 inches off the floor.
Sit while you bathe
Standing on a wet surface while washing your hair is one of the riskier moments. A shower chair or sliding bath transfer bench lets you sit, and a handheld showerhead makes it easier to bathe from a seat. A long-handled bath brush saves reaching and balancing.
Lighting, water temperature, and getting help
- Lighting: use bright lighting and a night light on the path from the bedroom to the bathroom.
- Water temperature: set the water heater to 120 °F or lower to reduce scald risk.
- Doors: choose a lock that can be opened from the outside in an emergency.
- Reachable help: keep a phone nearby, and consider a waterproof medical alert device if you live alone.
- Storage: keep towels and toiletries between waist and shoulder height so you do not have to bend or climb.
After surgery or a fall
Bathroom needs often change after surgery. If you are recovering, see my posts on hip replacement and knee replacement, and read my guide to fall protection for seniors. Ask your doctor about a home safety evaluation by an occupational or physical therapist.
A quick bathroom safety checklist
- Grab bars at the tub or shower and beside the toilet
- Non-slip mat or strips in the tub or shower
- Rubber-backed mat outside the tub, and no loose rugs
- Night light on the path to the bathroom
- Toilet at a comfortable height, or rails and a raised seat
- Shower chair or transfer bench if standing is difficult
- Water heater at 120 °F or lower
- Phone or alert device within reach
For every room in the house, print my full home safety checklist.
Frequently asked questions
Do grab bars have to go into studs?
They should be fastened into studs or solid backing, or installed with anchors rated specifically for grab bars. Ordinary drywall anchors are not designed to hold a person’s weight.
How high should a grab bar be?
ADA standards place bathroom grab bars 33 to 36 inches above the floor. That is a good starting point for a home, but have the person who will use it show where they naturally reach.
Are suction cup grab bars safe?
They can loosen, so many safety experts recommend permanently mounted bars for primary support. Suction versions are better as a temporary or travel option.
Can I use a towel bar as a grab bar?
No. Towel bars and soap dishes are not designed to hold your weight and can pull out of the wall.
Do I need a professional to install a grab bar?
Not always, but it is worth it if you cannot find studs, are unsure about pipes or wiring, or have a fiberglass or acrylic wall. When in doubt, hire a handyman or contractor with accessibility experience.
What is the best first upgrade for a senior bathroom?
For most people, it is a properly installed grab bar at the tub or shower, followed by non-slip surfaces and better lighting.
Sources and further reading
- ADA Standards for Accessible Design: grab bar requirements [https://www.ada.gov/law-and-regs/design-standards/]
- CDC: Check for Safety, A Home Fall Prevention Checklist for Older Adults [https://www.cdc.gov/steadi/pdf/steadi-brochure-checkforsafety-508.pdf]
- Your grab bar manufacturer’s installation instructions
This page is for general information and is not professional or medical advice. Follow the manufacturer’s instructions for any product, and talk to your doctor or a qualified professional about your situation.
Eddie Vandam
About the Author: Eddie Vandam
Eddie Vandam is a proud senior and retired internet marketer who now dedicates his time to helping others age well. As the voice behind the Senior Citizen Website, he shares practical advice on staying healthy, independent, and informed. From product reviews to wellness tips and hobbies that keep life interesting, Eddie writes with real-world experience and a passion for making senior life easier and more enjoyable.👉 Read more about Eddie Vandam.


